Common home styles, Home, Home building contractors, Home style in Texas
The state of Texas is diverse in many ways when it comes to cultural influences and architectural styles. With such vast open spaces and varying weather conditions in the region, it is no surprise how many different styles of homes have emerged to suit people’s tastes and ways of living. Among these styles, the Texas-style house stands out because of its versatility and beauty. So in this blog, we will examine the most common house style in Texas, with a focus on Texas-style ranch houses and Texas house design, as well as how they contributed to the architectural theme of the state.
Top 5 Most Common House Styles in Texas
Texas has a unique mix of Spanish, German, and Native American people due to its early settlers and that is why there are many different types of houses in the state. Each style is attractive and well-designed and is quite suitable for the climate and landscape of different areas of Texas. Below are some examples of the popular house styles in Texas and their main features:
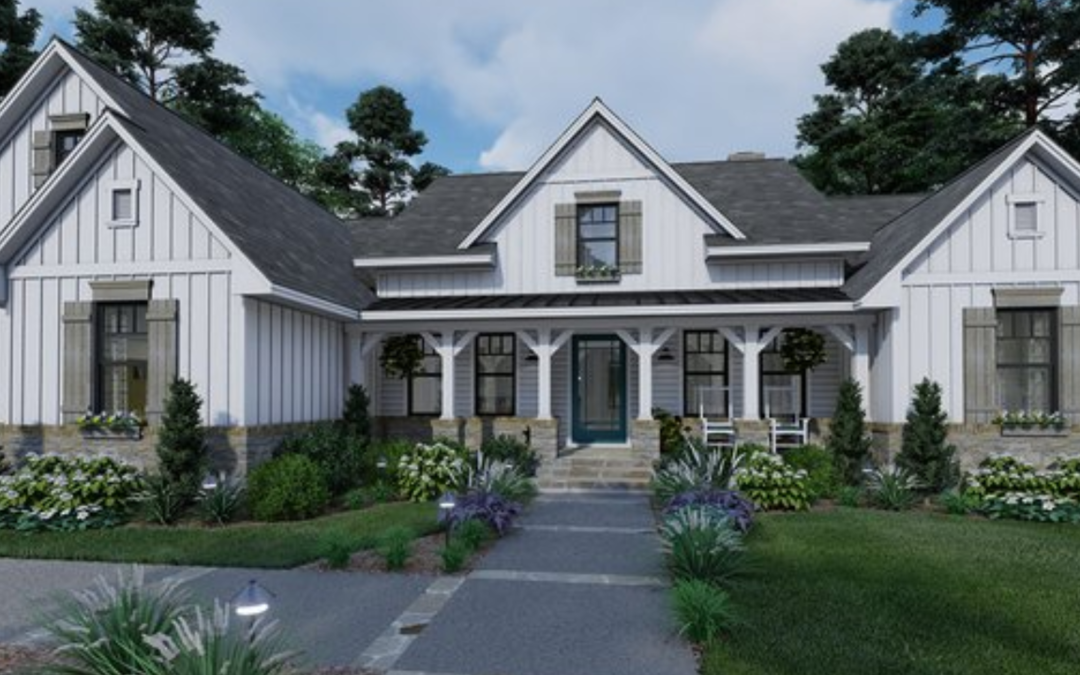
1. Ranch Houses: The Quintessential Texas Style
Ranch houses are probably the best-known Texas-style houses. It started in the early 1900s, and it features a long and low one-level building appropriate for families and entertaining space. There is usually a large area set aside for living that is combined with an area with a kitchen and dining table, allowing people to spend time together.
Key Features:
- Single Story: Most ranch houses are single-story, which makes them ideal for families with young and elderly members.
- Open Floor Plans: The layout of rooms offers flexibility in the arrangement of spaces within the home.
- Large Windows: People often focus on the larger view of nature, which gives secondary importance to designer decisions.
Ranch houses are customized because they can either be modernized or decorated in Texan elements. Of course, these can be painted in earth tones or vibrant colors to suit the natural feel, and they will still be attractive and aesthetically pleasing.
2. Victorian Manors: A Touch of Elegance
While Texas-style ranch houses are the predominant feature of the Texas landscape, Victorian manors bring a certain regal flavor and historic touch. They were built with elaborate decoration, high-pitched roofs, and fine timbering and were typically two-story residences. The Victorian style typifies the splendor of the last third of the 19th century, and plenty of buildings of this style can be seen in older neighborhoods.
Key Features:
- Ornate Trim and Molding: Victorian homes are characterized by extra ornate work, such as trim, spindle work, and brackets.
- Asymmetrical Facades: A distinctive visual appeal is achieved by the frequent use of asymmetrical shapes and proportions in the design.
- Turrets and Bay Windows: Most Victorians have special features, including turrets or bay windows, that make them even more special.
These homes are not as popular as today’s ranch homes, but are an example of the history of architecture in Texas and are admired by those who enjoy traditional homes.
3. Craftsman Bungalows: Cozy and Functional
Craftsman bungalows are another favorite type of Texas house design. Most of these homes were built in the early half of the 20th century, a product of the Arts and Crafts architectural styles embellished with their simplicity and highly functional designs. It is always based on quality materials and most of these are hand-crafted, making them preferred by those who want a warm home atmosphere.
Key Features:
- Low-Pitched Roofs: Craftsman bungalows have large roofs and low slopes; the roofs make the homes feel warm and down-to-earth.
- Built-In Features: Most such homes have integrated pieces of furniture like bookshelves and benches that serve efficient purposes.
- Natural Materials: Craftsman homes use wood and stone features related to the houses to the natural environment around them.
Craftsman bungalows are considered fashionable homes primarily because of their attention to detail, and they remain a popular choice among Texas residents regardless of the era.
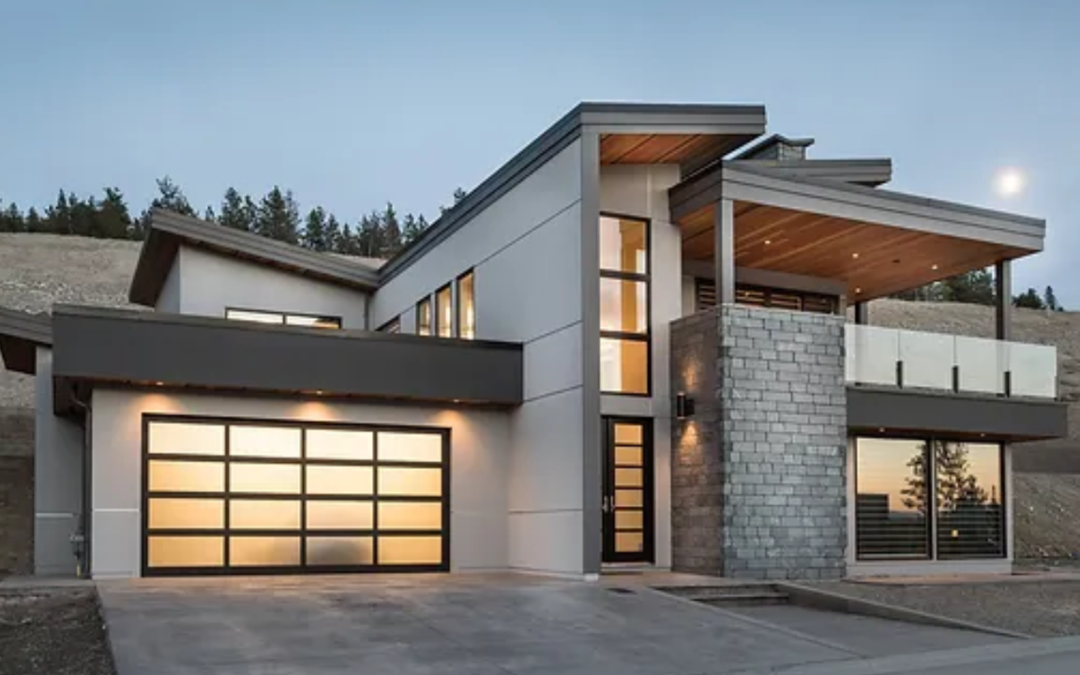
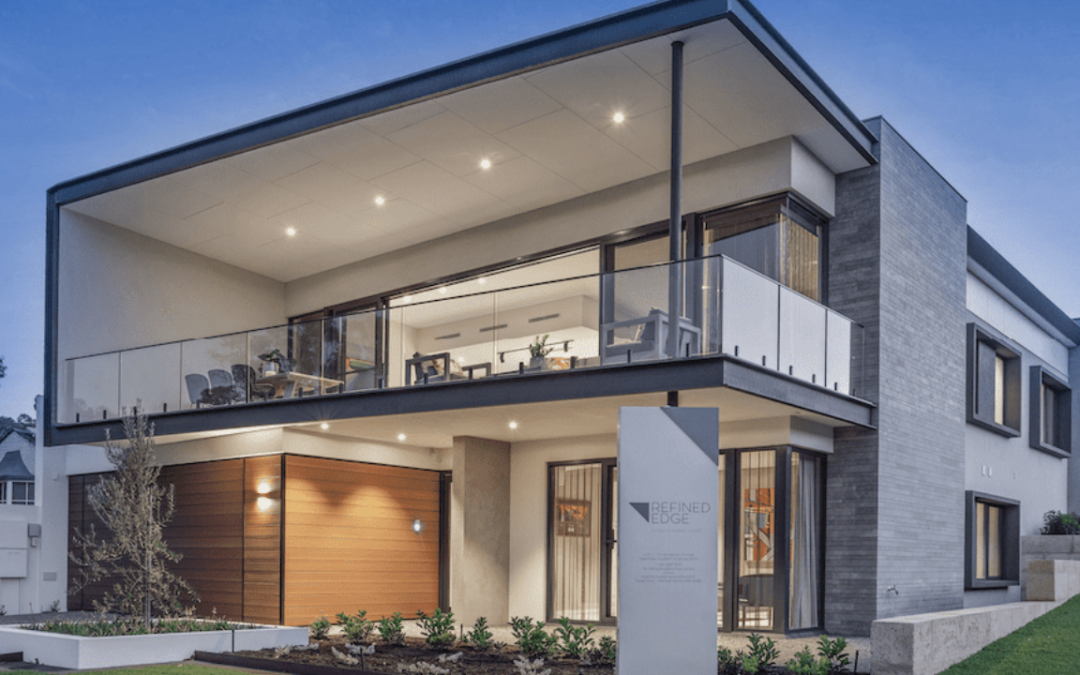
4. Modern Homes: A Contemporary Approach
In recent years, modern homes have become a trend for residents throughout the state of Texas, especially in urban areas. The first type of home focuses on smooth construction lines and the unobstructed space and materiality of the new home environment that lead to new lifestyles and preferences of contemporary homeowners.
Key Features:
- Open Concept Living: Modern architecture may include large, liberal planning to create as many so-called ‘great common spaces’ as possible.
- Sustainable Materials: Many of the modern designs involve the use of friendly materials and efficient energy handling systems, appealing to any discerning buyer.
- Large Windows and Natural Light: Current architecture emphasizes connection to nature and therefore large windows doors and other glass structures are used to let in lots of light.
Modern homes allow people to choose an architect’s design and build a home without any obstructions, ranging from simple and glass-doored homes to constructions with artistic elements.
5. Mediterranean-Style Homes: A Taste of the Old World
Other types of homes popular across the country include Mediterranean homes, especially where the climate is similar to the south of Europe in this region. These homes are influenced by Spanish and Italian styles, with stucco exteriors, red tile roofs, and arched doorways.
Key Features:
- Stucco Exteriors: Exterior walls are often decorated with stucco, resulting in a smooth, textured surface.
- Red Tile Roofs: Distinctive red clay tiles provide a unique appearance, enhancing the overall Mediterranean feel.
- Outdoor Living Spaces: Mediterranean residences often include spacious patios, courtyards, and balconies that promote outdoor living.
These homes evoke a sense of warmth and hospitality, making them a popular choice for families looking to create inviting spaces.
Conclusion: Finding Your Perfect Texas-Style House
With its diverse architectural landscape, Texas has a vast choice of home designs to appeal to any client and any lifestyle. From Texas-style ranch homes to stately Victorian manors and small Craftsman bungalows, everyone can find something they like. Other types of architecture are found in other parts of Texas, ranging from modern architectural designs to Mediterranean homes that are now popular in design trends over time.
When choosing a Texas house design, it depends on your lifestyle, your preferences, and important features. No matter whether you are committed to the spectacular spaces of a ranch house or love the elegant ornamentation of a Victorian mansion, an overview of the most popular house styles in Texas can help you decide on your future home more effectively.
At Christopher Custom Homes, we build top-notch construction and stunningly beautiful homes tailored to our client’s needs. Take a look at our options for Texas-style homes and see how we can make your dream home a reality!
Home, Home building contractors
“Home is where the heart is’.’ Certain elements need to be utilized to make the building stand erect. It is generally accepted that the selection of materials and their quality can largely determine the characteristics of a home, such as durability, beauty, and energy efficiency. In this blog, seven common materials used for home construction are introduced, both traditional and eco-friendly. Reading about the different types of building materials will guide you in choosing what is right for your next construction project.
Types of Building Materials Used in Home Construction
Building materials are generally classified into two origins: natural and man-made. Both must be created or treated before they can be used in construction. Here is a list of materials used in building construction:
1. Wood: A Classic Choice for Framing and Finishes
Wood is probably one of the most accessible and the most global construction materials that are used in homes. It is mainly used in framing, flooring, and even in cabinetry construction.
Benefits of Wood
- Sustainability: In the case of well-managed and controlled resources, wood is one of the fantastic materials that can be used in construction.
- Insulation: Wood exhibits the best thermal conductivity and keeps the temperature inside the home stable.
- Aesthetic Appeal: It can create coziness and personality in any space.
Considerations
- Maintenance: If wood is not preserved, it can easily rot, get infested with pests, and catch fire.
- Cost: Good-quality wood is relatively expensive; obtaining it for custom builds can be especially costly.
2. Brick: Timeless and Durable
Brick is a classic building material that has been widely used for centuries. Despite being primarily used on walls, brick can be a great insulating and soundproofing material.
Benefits of Brick
- Longevity: Buildings made from brick typically last for decades with very little wear and tear and possibly require very little remodeling.
- Energy Efficiency: It plays a huge role in regulating the internal temperature of the building through thermal mass.
- Fire Resistance: Brick cannot burn, which means its use in a home will help bring an extra level of safety.
Considerations
- Cost: Using bricks can be cheap but quality bricks can prove to be expensive.
- Labor-Intensive: Brick laying involves the use of human skills and this can be costly in terms of construction expenses.
3. Concrete: Strength and Versatility
Concrete is one of the most popular building materials of the modern age. This type is mostly applied in development construction, such as the laying of foundations, walls, and even driveways, because of its high strength.
Benefits of Concrete
- Strength: Concrete can withstand various weather conditions and it has the capacity of handling very many people or things at a certain given time.
- Versatility: It can be shaped into various shapes and varieties of texture, and this makes it have design versatility.
- Low Maintenance: After it is set, concrete does not need much maintenance as compared to what one would have to do when using other materials.
Considerations
- Environmental Impact: Of all the building materials, concrete production contributes to a large extent to carbon emissions.
- Insulation: concrete can not be as friendly to energy efficiency as it might appear unless used in conjunction with insulation.
4. Steel: Strength Meets Modern Design
Steel has rapidly become the preferred material of choice in home construction, especially in commercial and industrial structures. Due to the properties of its materials, it is well-suited for construction of structural frameworks. Home builders Marble Falls TX can provide expert insight into using steel for both residential and commercial projects.
Benefits of Steel
- Durability: It does not bend easily, does not crack and it cannot be easily infested by insects.
- Design Flexibility: It enhances possibilities for designing structures that lack load-bearing walls, and large-open spaces.
- Recyclability: Steel is reusable in its highest capacity; therefore, steel qualifies as an environmentally friendly product.
Considerations
- Cost: Steel can be very costly right from the beginning compared to other materials that are in the market.
- Thermal Conductivity: Steel has heat conductivity characteristics that may call for supplementary insulation.
5. Stone: Natural Elegance and Longevity
Natural stone used in construction is famous for its elegant appearance and sturdiness. Used to construct foundations and walls, and as enhancement structures, stones bring a rather special touch to homes.
Benefits of Stone
- Durability: Weatherwise and about pests, the stone is very hardy.
- Aesthetic Appeal: The stones are unique, which gives them a customized look.
- Low Maintenance: Stone demands very little attention once it has been installed.
Considerations
- Cost: Natural stone is rather costly, as well as might only be installed by certain professionals.
- Weight: It could be a little hefty, which may need extra support in terms of structural framework.
6. Glass: A Modern Touch
Glass is common these days to be used as windows, walls, and even some brands of floors. From the above-explained concept, it improves natural lighting and gives the building a fashionable look.
Benefits of Glass
- Natural Light: There is a lot of natural light coming through the glass, so less artificial lighting is needed.
- Aesthetic Appeal: It gives a spacious ambiance to a house.
- Energy Efficiency: With the advanced kinds of glasses today, the problem of insulation can be addressed.
Considerations
- Privacy: Glass may not offer some of the privacy desirable by homeowners.
- Cost: It has been found that high-performance glass comes at a price.
7. Sustainable Building Materials: A Growing Trend
Through the years, the concern about the environment has gone up and several builders are using green materials. Such materials can be recycled products, free from harm to the natural environment products, and products made from renewable resources.
Types of Sustainable Building Materials
- Bamboo: A rapidly renewable resource that is also very strong and has a range of uses.
- Recycled Steel: Scrap steel can be used because it saves resources and prevents any waste from being produced.
- Reclaimed Wood: Using wood from old buildings has a character of its own apart from the fact that it helps to conserve the environment.
Benefits of Sustainable Materials
- Reduced Environmental Impact: These materials can be used to reduce carbon footprints.
- Energy Efficiency: Most sustainable materials outperform traditional construction materials in terms of insulation
- Healthier Living Spaces: The use of low-VOC (Volatile Organic Compounds) helps improve indoor air quality.
Considerations
- Availability: Sustainability requires sourcing products that might be precise to find in the market since they are unique.
- Cost: As far as price goes, there are often options where sustainable goods are priced a little higher than their counterparts.
Conclusion: Making Informed Choices
Choosing the right material for your home construction is important regarding its durability, energy efficiency, and its look. It will also assist you in making informed decisions in determining what type of material to use in the building depending on your needs as you appreciate the strengths and weaknesses of different types of building materials. When it comes to selecting these materials, you can stick to the central, more well-known forms of construction materials, such as wood and bricks, or, on the other hand, can go for the more contemporary and environmentally friendly forms of construction materials.
In this way, when deciding on certain types of sustainable building materials and their effects, you can help to enhance the quality of both your own living space and the environment we inhabit. In choosing the right materials for your home, you’re not just building a structure; you’re creating a sanctuary that reflects your values and lifestyle. At Christopher Custom Home, we’re here to help you navigate the options and find the perfect materials for your vision. Let’s build something beautiful together!
Home, Home building contractors
Building a house is one of the biggest achievements in one’s life thus selecting the appropriate materials is extremely important for the stability, usage, and appearance of the house. Whether you’re installing a new house or beginning a custom project, this outline of the key materials needed to build a house will help you navigate each stage of the process. This blog will guide you through the best building materials for use in the construction of residential buildings and this will enable you to make appropriate decisions and which is most appropriate for you.
7 Types of Building Materials Used in Construction
The construction industry provides a vast number of materials, and all of them have different characteristics and functions. However, both must be manufactured or processed before being used in the building. Materials used in building construction include the following:
1. Foundation: Building a Strong Base
The foundation particularly holds a prestigious position and is regarded as one of the most important phases of construction. Regarding the construction process of a house, the materials published should offer stability and support to all the structures. Here are the primary materials used for building a foundation:
- Concrete: One of the most used materials for home construction is concrete as it forms a strong foundation capable of supporting so many types of soils. It is often reinforced with one rod or mesh to enhance tensile strength in the structure.
- Rebar (Reinforcing Steel): Combined with concrete, rebar increases tensile strength several times, so the foundation can support heavy loads and compensate for such natural phenomena as soil swelling or earthquakes.
- Gravel: In many cases before concrete pouring, gravel is usually placed to ensure a proper grade is achieved. It also aids in water discharge to eliminate any possibility of dampness under the structure’s foundation.
When engaging in the construction of house building materials, you are guaranteed to be strong, durable, and resistant to environmental conditions.
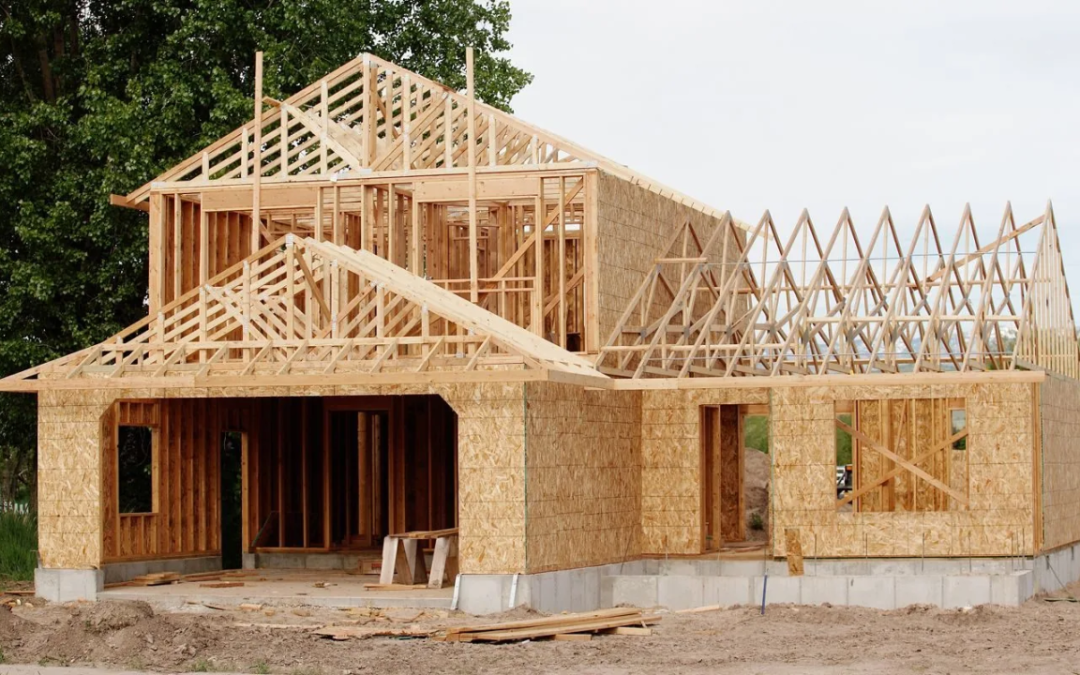
2. Framing: The Skeleton of the House
Another important step is known as the framing step. Framing is the construction of the framework that gives your home the general layout or “skeleton” as some people call it. There is nothing more important than making the right decision on the materials used in home construction that support the roof, walls, and floor.
- Wood: Wood is by far the most commonly used framing material in residential construction because wood is flexible, accessible, and affordable. Many people regularly use wood like pine and fir.
- Steel: In the modern world of construction, steel is being used more and more because it has high strength and is fire resistant. Although it costs more than wood, it is a stronger type that cannot warp, mold, or attract termites.
- Engineered Wood Products: These are laminated veneer lumber (LVL) and glued laminated beams. This is achieved by combining wood fibers and synthetic resin adhesives that provide more strength than normal wood.
Wood or steel: This decision will be based on factors such as climate or money, but both will provide adequate structure for the home.
3. Walls and Insulation: Keeping the Home Comfortable
Walls do more than separate rooms; they act as insulators of light, heat, and sound and act as barriers to harsh weather conditions. At this stage, the necessary materials for house construction are known to define the efficiency and the comfort of the living environment.
- Bricks: Bricks are one of the traditional construction materials that could be used to construct a house due to their thermal properties, durability, and beauty. Such are designed to be applied to the exterior side of buildings, they are very appropriate in terms of providing shelter from heat, cold as well as moisture.
- Concrete Blocks: Concrete blocks are cheaper and Rio, fire-resistant as opposed to bricks, and very strong. It is applied in the construction of walls both on the outer part of the building and the inner side.
- Insulation Materials: Insulation is indispensable when you want your home to be energy efficient. Many insulating materials are used in constructing a house such as fiberglass, foam boards and spray foam. Both have various R-values, a vital parameter determining the effectiveness of insulation, and depend on the climate.
To guarantee sustainable insulation walls and insulation materials pick a quality that will offer the best and best output as far as insulation is concerned.
4. Roofing: Protection from the Elements
The roof is one of the necessities when constructing a house because it shields the house from rain, snow, heat, or wind. It is also of great importance in improving the looks of the home, as would be evident from the rest of this piece.
- Asphalt Shingles: Asphalt shingles are probably the most popular type of roofing material because they are inexpensive, reliable, and come in many different shades. They come with decent water resistance and can be installed easily.
- Metal Roofing: Rising in demand, metal roofing is fire resistant, lasts longer than other products, and is energy efficient. The life expectancy of shingles is usually considerably longer than such types of roofs which can cost more to install than other roofing materials.
- Clay or Concrete Tiles: These tiles should preferably be installed in houses constructed in regions with high temperatures since they provide sufficient thermal insulation. They are also very long-lasting, and most of them are designed to serve up to 50 years and above if well maintained.
Ideally when choosing materials to build a home, should think about the climatic conditions of the region of the roofs.
5. Flooring: Balancing Durability and Aesthetics
The flooring materials you choose for the home should be able to handle a lot of traffic, be comfortable, and enhance the look of the home’s interiors. Here are the most common materials to build house flooring:
- Hardwood: Classic as well as practical, this is a flooring type that is always popular, in addition to being sturdy and friendly underfoot. For example, oak, maple, and cherry are some common ones.
- Tile: Ceramic and porcelain tiles are very durable, completely waterproof, and available in a variety of looks and colors, making them ideal for use in kitchens, bathrooms, hallways, and other areas of the home.
- Laminate and Vinyl: These are cheaper products than hardwood and tile. Laminate looks similar to wood and vinyl can look like wood or tile and is more versatile in terms of design at a lower cost.
Flooring is mostly selected based on its ability to meet these three aspects of use and when done this way, it fits well into the home.
6. Windows and Doors: Enhancing Light and Security
Windows and doors also perform other functions for the building such as insulators and security. Thus, the best building materials used for these features should be both efficient and decorative.
- Wood: These types of frames provide very good insulation and have a traditional and practical look. They can be painted or stained to meet specific design requirements for any decor.
- Vinyl: Commercial products such as vinyl windows and doors are very strong, and also conserve energy. They are easy to repair if you lack the skills to maintain them and they come in a variety of colours and designs.
- Aluminum: An even more contemporary option is aluminum frames – this option is not too heavy and does not rust. Still, they offer the least insulating quality compared to wood or vinyl doors.
Choosing quality windows and doors will guarantee the long-term comfort and security of the home.
7. Finishing Materials: Bringing the House to Life
Finishing materials add the finishing touches to your home and help define your preferred color and style. These include paint, Leader, Evans, and many others that are essential materials needed for house construction that provide style and functionality.
- Paint and Plaster: These materials are crucial that are important in the finishing of interior and exterior walls. Weather-resistant paint should be used on the exterior of your home while paint and plaster used on the interior of your home add texture and color.
- Cabinets and Countertops: Marble, wood, and laminate are common materials used on cabinets and countertops. These should be durable and preferably easy to clean, especially in areas like the kitchen and bathroom.
With the right finishing touches, your house will feel like a home, reflecting your personal style and functional needs.
Conclusion
Choosing the proper inputs for building a home is important so that the home is durable, comfortable, and efficient to live in. The exterior and interior aspects of your home are not in vain, from ground to roof, and all together give your home a unique look. Quality is a key principle at Christopher Custom Homes as the company seeks to give its customers high-quality materials and works to improve the construction of their dream homes.
Whether you are building your home from the ground up or renovating an existing structure, the type of material you choose can make a difference. From concrete and steel to wood and tiles, these home-building materials will give you the ability to build your home with the aesthetic you want to achieve, while also providing you with the comfort and stability you need for your home in the long run. We will help you make the right decision when choosing the type of frame for your next project.
Home, Home building contractors
One of the first things to consider when thinking about building a small house in Marble Falls, Texas, is the cost. What would it cost to have that dream house of yours in this beautiful Hill Country town? Christopher Custom Homes allows you to build custom homes that meet your desires and budget. Although the cost of building a house depends on certain factors, which are highlighted in this article, this piece will help you understand the cost of building a small house in Marble Falls.
The Cost of Building a Small House in Marble Falls
The total cost per square foot to build a small house in Marble Falls is dependent on the following factors; the size of the House, the type of material used, and the finishing. Although deciding to DIY the construction of your home might be tempting, it comes with its pitfalls. When working with Christopher Custom Homes, you always get advice and you’ll also get the services of a home construction estimator who can help you plan the best budget. For instance, construction prices in the Marble Falls region may go from $150 to $300 per square foot, depending on your requirements for the interior décor and other amenities.
Factors Affecting Home Building Costs in Marble Falls
1. Home Size and Layout:
Home size is one of the most important contributing factors to overall costs. A small home is usually between an area of 1,200sq ft and 2,000sq ft. The number of bedrooms and numbers of bathrooms that are available also counts for it along with other extra facilities such as several garages or porches.
2. Land and Site Preparation:
However, to build the home, you have to start with a plot of land. Land in Marble Falls ranges in price and depends on its location, size and the view it has to offer. As you can imagine, Marble Falls is a pretty area, so a plot with a view of the lake or the hills might be a little extra. Additional costs include costs of site preparations such as leveling the ground, or having to cut down trees, among others.
3. Materials and Finishes:
The most important factors that influences the home price is the type of material used in constructing the house. There is a vast range in cost when becoming fixated on high-end finishes, custom cabinets, or any of the other, more basic fifty-eight materials. For this reason, when you contact Christopher Custom Homes, you get to make a decision on which materials fit your style best and are affordable.
4. Labor Costs:
The effort involved in construction is another factor in the cost of homes. Professionalism is incredibly important for work quality, but it is inexorable. Contractors, electricians, and plumbers can be found in Marble Falls, but charges differ. A building estimator is capable of ascertaining these costs by producing cost estimates based on the current market prices in the region.
5. Permits and Inspections:
Keep in mind the expense associated with obtaining permits for construction and necessary inspections. If you are in Marble Falls, you will need permission from local authorities to confirm that your choice of construction is within the country’s building code. These permits can cost anywhere from a few hundred to several thousand dollars, depending on the work to be done.
Customization: The Heart of Christopher Custom Homes
At Christopher Custom Homes, we believe that everyone has their own specific wishes and interior design needs. That’s why people turn to custom home builders to provide them with what they want in a new home. Even from the design of the project to the final tour, it’s all done professionally by our team.
If you are looking for a small home in Marble Falls; our team will assist you in making every decision related to the purchase and help you stay within the given financial means, as well as find a home that you will love. No matter whether you are interested in the installation of energy-saving solutions, materials for a luxurious kitchen, or additional architectural elements, these will all affect the total cost.
Using a Home Construction Estimator
A home construction estimator can be greatly useful in terms of budgeting as well since you can control the amount being spent. This tool enables you to put down certain characteristics and information concerning your preferred home for instance size, material, and location, and get an estimated cost. At Christopher Custom Homes, our estimators allow you to see a breakdown of all the expenses, thus making it easier for you to work with.
The home building cost estimator includes factors like:
- Estimated price per square foot
- Land acquisition costs
- Utility connections (water, electricity, etc.)
- Landscaping and outdoor features
- Labor costs
By utilizing a building estimator, you can fix the various variables to understand how a given decision affects the costs. This is particularly helpful when you are trying to decide whether to spend or cut back on a certain area.
The Benefits of Building in Marble Falls
Marble Falls is a beautiful town situated in the countryside of Texas which is famous for its beautiful and peaceful location. It’s an ideal place for those who want to get away from the bustle and noise of big cities but do not want to go too far from Austin or San Antonio. Building a home in this area allows you to enjoy:
- Beautiful natural surroundings: Marble Falls, Texas, is famous for Marble Falls, beautiful view on the top of the hill, beautiful landscape, and Lake Marble Falls.
- Small-town feel: You will be incorporated into a close-knit community that includes the culture of living a less hurried life.
- Outdoor activities: For nature lovers, plenty of parks, trails, and water activities for people to enjoy are nearby.
The cost of living in Marble Falls is also low compared to other large cities in the area, and that can benefit from building here.
Choosing Christopher Custom Homes for Your Project
At Christopher Custom Homes we build homes of optimum quality and more to your specifications and requirements. Constructing your own home may sound like a daunting task, but we avoid any confusion and offer reliable price quotes at every step in the process of building your home.
1. Transparent Cost Estimates:
All aspects to do with the construction of a home are a serious investment and for this reason, we work with special tools such as the home construction estimator, and the home building cost estimator to give our clients the best price offering in the market.
2. Expert Team:
Our highly skilled staff collaborates with you in the execution of your project. Whether you want a contemporary architectural style or the old-world charm of the Hill Country styles, we have the talent and experience to build the style desired.
3. Quality Craftsmanship:
We go to the extent of consulting when laying down the foundation and when completing other phases of construction. We have agreements with most of our subcontractors and suppliers so that the materials used are of the best quality.
4. Personalized Service:
In the construction of our custom homes, this company’s main focus is on the client’s needs and wants. All the homes are unique whether you choose Christopher Custom Homes as your builder and we aim to impress with every detail.
How to Get Started
Ready to take the next step? If you are thinking of building a tiny house in Marble Falls, you can contact the team at Christopher Custom Homes. Let us walk you through this step and then give you a comprehensive building estimator that gives you the estimated cost of specific work that needs to be done.
We are here to provide the best information a layman could need when building a home; from land selection to materials and everything in between. Some people want a small and cozy cottage, others want a new home in the form of a contemporary farmhouse in Marble Falls, we’re ready to build the perfect home for you in Marble Falls.
Contact Christopher Custom Homes Today!
Building a small house in Marble Falls with the right contractor is a thrilling and satisfying experience. When working with the most talented professionals in the construction industry, Christopher Custom Homes, we strive to make your home a reality with well-understood prices that are easily within anyone’s budget. All of our homes are high-touch custom designs, and we promise to make building your home easy and enjoyable.
Contact us today and let us give you a free home-building estimate so you can get started building your home in Marble Falls. Let us provide you with the information you need so your home-building process is as stress-free and enjoyable as possible!
Home, Home building contractors
Building a custom home is the desire of many homeowners due to the possibility of creating a home that meets their specific requirements. However, owning a custom home is more than the selection of floor designs and colors of the walls. It comprises all the aspects of location, price, planning, and designing to how and when the building will be constructed. Professional services from skilled service providers such as Christopher Custom Homes, and a custom home general contractor guarantee that every detail is well thought through and implemented in line with your expectations. As you read this article, you will have an insight into what goes into the making of a dream custom house.
What to Think About When Building a Custom Home?
The process of design and construction is important for a custom home before going into the detailed concept and construction. This involves determining your lifestyle requirements, choosing and sticking to an affordable price range, and comprehending the opportunities of furniture design. Here are some essential considerations when embarking on the journey of building a custom home:
1. Lifestyle Needs and Preferences
Your home should echo the mode in which you live. This is the basis for most custom house designs for most people. When choosing a custom-designed home builder, a person has to think about everyday habits, family organization, or potential changes in the future. For instance:
- Do you need a home office or study area for remote work?
- How many bedrooms and bathrooms are required to accommodate your family and guests?
- Is an open-concept layout important for your lifestyle?
- Do you prefer modern aesthetics or traditional elements in your home design?
These questions assist you in speaking out your wants to the custom home general contractor to be included in the architectural drawings.
2. Budget
The amount of money or the budget you set for your new home will be a major clue as to what you want your custom home design to look like. Understanding this helps your contractor recommend the best since you know your financial ceiling without going for inferior parts. This accounts for construction costs and ensures that they do not Spiral out of control when construction is in progress.
Some factors that impact the cost of your custom home include:
- The size of the home
- Type of materials used
- Complexity of the design
- Energy-efficient technologies
- Sustainable building practices
It’s wise to agree with your contractor on a probable reserve for any extra costs that may be incurred while constructing the house.
3. Location and Site Considerations
The space of the lot that your home will be built, including its elevation will also dictate the style of the home. The general contractor for custom home requires having a general idea of the type of soil, slope, and environment to ensure the house is stable. For example:
- Sloped lots may need split-level or multi-story designs.
- Coastal areas may require raised foundations.
- Scenic views should feature large windows or outdoor spaces.
Other restrictions that may affect the details of a custom home include local zoning laws and ordinances of neighborhoods. Other local ordinances exist as to location, the size of your home, or even finishes that your home must meet in that region.
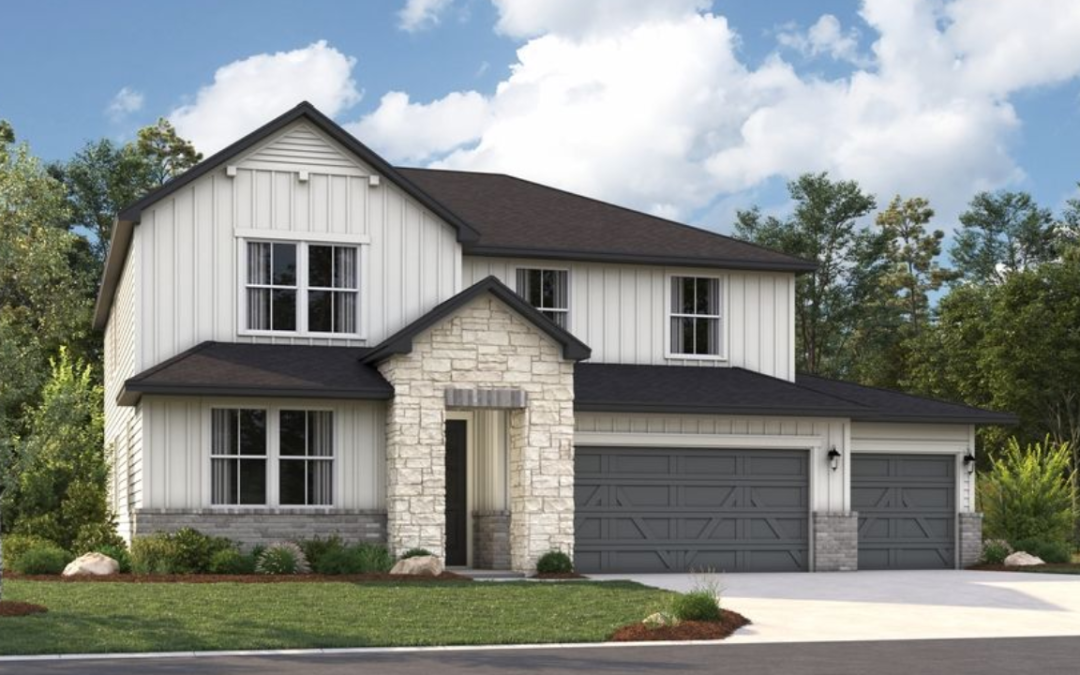
4. Architectural Style
Picking a favorite for your architectural design is as important and fun as any other part of the procedure. Whether you prefer a modern, minimalist approach, a traditional farmhouse, or a luxurious Mediterranean-style villa, your choice of architectural style will determine various design elements such as:
- Rooflines and exterior facades
- Window shapes and sizes
- Materials like brick, stone, or siding
- Interior design features, such as open beams or vaulted ceilings
To achieve the best results clients should hire custom-designed home builders who have been practicing different styles of architecture.
5. Functionality and Layout
There exists little difference between the concept and design of a house as well as functionality. It is therefore important to properly design your home to effectively utilize the physical space, provide comfort, and improve the functionality of each room. Important aspects to consider include:
- Flow and Circulation: Distances between rooms should not be too tight and should be in such a way that they are easily accessible. For example, locating the kitchen close to the garage may help in the storage of groceries after shopping and retiring, while arranging for bedrooms to be located off the living areas may afford a certain degree of privacy.
- Room Placement: There are possibilities of room placement affecting energy efficiency. For example, locating habitable rooms that require considerable natural light like the dining room and kitchen toward the south exposure to capture natural light enables one to save energy during the cold season by keeping the internal temperature warm.
- Storage Solutions: Don’t leave storage while designing repetitive buildings. People getting custom homes benefit from the construction of spacious wardrobes, kitchen cabinets, and featured attic space for storing items.
6. Sustainability and Energy Efficiency
Essential aspects such as sustainability and energy efficiency of homes are now a priority among customers who build custom homes. Planning your home with such factors into consideration is not only eco-friendly but also economical in the long run on energy bills. Some eco-friendly considerations include:
- Solar Panels: Solar energy utilization is a good way to decrease the amount of carbon emissions within a house.
- Energy-Efficient Windows and Insulation: Insulation and windows are the best investments one can make throughout the house since they control the heating and cooling costs.
- Sustainable Materials: Recycling of building materials such as bamboo floors, or recycled wood is also another consideration that will make your home environmentally friendly.
Your custom design home builders can direct you to many different sources to consult on environmentally friendly ideas to install in your home.
7. Future-Proofing Your Home
Building a custom home is a luxury, it requires a long-term approach. That’s why when choosing the design of your home, you should be thinking about how you are going to need to use the house after a few years or decades. For instance:
- If you want a home that will never be old, wide doorways, single-level living areas, and an elevator may be a good feature to include.
- If you are planning for a large family, more bedrooms may be needed or the space may need to be converted from one use to another.
- Smart lighting, security systems, and other related home technology can be useful in keeping the home from becoming outdated as technology advances.
What Factors Determine the Structure and Design of a House?
The structure and design of a custom home are shaped by multiple factors, including:
- Climate and Environment: In some regions, in winter climates, homes will require mechanisms for insulation and heating to protect them from the cold while in other regions, such as summer climates, homes will require mechanisms for ventilation and cooling.
- Building Codes and Regulations: There are local laws that can dictate everything from the size of the home to the type of materials used.
- Available Materials: Home design elements are flexible, and the style, color, and type of materials used in the construction process including wood, stone, or metal determine the appearance and robustness of the home.
- Technological Integration: As technology advances, it evolves that modern homes can be fitted with automation systems, home theaters, and energy systems.
What Are the 4 Characteristics to Consider When Designing a House?
When designing a custom home, four essential characteristics should guide the process:
- Aesthetic Appeal: Many homeowners don’t pay much attention to the design of their homes because it is an extension of their personality.
- Functionality: Make sure the home’s layout meets the functional requirements for day-to-day use and is both comfortable and convenient.
- Sustainability: Use energy-efficient technology and environmentally conscious materials to reduce your energy footprint.
- Longevity and Durability: Choose better quality materials and patterns that will last in terms of both durability and looks.
Conclusion
Designing a custom home involves individual and family needs, desirability of the site, privacy, moving costs, and sustainability. When working with design home builders like the custom design home builders at Christopher Custom Homes, everything in your home is well-arranged and built to perfection. Your custom home should not only have aesthetic value and your tastes and preferences, but also be functional and environmentally friendly at different stages of life. Whether you are starting the whole process or just changing your ideas, hiring the best custom home general contractor can help you achieve your goal.
Home, Home building contractors
Building or designing your own home is the desire of most people; however, it can turn out to be a costly affair if the proper strategy is not adopted. There are many ways you can ensure that your decision to build an affordable custom home meets the common and worthy standards. It is possible to save money when it comes to material selection, design solutions, and project management while still achieving the desired results to get a comfortable home. In this blog, you will learn the most cost-effective way to build your custom home.
7 Cost-Effective Ways for Building Your Custom Home
Here are a few cost-effective ways to build your custom home:
1. Plan and Budget Wisely
Proper planning and initial developments of a construction project involving a custom house require an initial strategic plan and financial cost estimate for the purpose of meeting its aim of utilizing efficient economical methods. Collaborate with a custom home builder like Christopher Custom Homes to come up with a design and cost on different phases of the construction process. It can allow you to track your spending accurately, understand where your money is going and even which components of the project need revision. Another important factor that must be considered is contingency costs, which are expenses which have not been foreseen and appear during construction.
- Key Tip: Start with a fixed budget and stick to it as much as possible. Regularly review costs with your builder to stay on track.
2. Choose the Right Location
The price of your land will define a large portion of how much it will cost to construct a house that reflects your custom home. Another area of concern while selecting a site is whether it is compatible with the zoning ordinances of the land, electricity, and costs of preparing the land. Avoid the use of grounds that need much grading or even clearing, as these services are very expensive. Also consider how far you’d be from key facilities such as schools, hospitals, and work—over the long term, the cost of transport can impact your home.
- Key Tip: Avoid purchasing land that will need extensive site work or modifications, as this can inflate the cost of your build.
3. Simplify the Design
Although choosing a large architectural style may be alluring, minimalism frequently results in cost savings. Complicated geometries of the walls, where the floor plan includes multiple corners, curves, or other details in the roofing, lead to increased labor and material costs. Instead, select a plan that has straight walls like rectangles or squares because they are less costly and easy to construct. While the over-the-top looks were part of the early gothic style, one can still achieve a great look without going overboard, where smart layouts, open spaces, and functional designs crop up as evidence.
- Key Tip: Work with your architect to create a design that balances beauty with practicality.
4. Prioritize Energy Efficiency
Constructing an energy-efficient home is one of the best ways to save money both during the construction phase and throughout the usable life of your residence. Using energy-saving materials and technologies can decrease more frequent energy expenses in the long run. Some of the strategies include: Insulation; windows; and solar energy. Despite having these factors more expensive than they are in the first place, the long-term cost of electricity bills can offset these costs.
- Key Tip: Look into energy-efficient appliances and HVAC systems to further reduce your home’s running costs.
5. Consider Modular or Prefabricated Components
Another method of reducing costs while avoiding compromising the quality of the material is to look at the buildings in terms of modular or prefabricated units. These are sections of a home that are designed and fabricated off the construction site and then fitted together at your convenience. Many people find that relocatable homes are cheaper than most custom builds because they entail less labor and material waste. The use of modular construction also brings shorter construction time as a result of the shortened time of financing.
- Key Tip: Discuss with your builder if a hybrid approach, combining custom and prefab components, could be a viable option for your home.
6. Source Local and Cost-Effective Materials
The type of material to be used in the construction of custom home can be very influential in the overall cost of the construction project. Choose local materials, since the price may considerably increase if many materials have to be imported from other countries because of the transportation expenses. It’s possible to use low-cost but strong and lasting materials such as concrete, steel, and recycled timber, which could also cut down greatly on the costs of construction.
- Key Tip: Choose materials that are not only budget-friendly but also environmentally sustainable for long-term benefits.
7. DIY Where Possible
Companies with construction skills or expertise should suggest tackling some do-it-yourself projects to cut labor expenses. You may not be able to construct the whole home by yourself but there are many little things that you can do. There are certain tasks, such as painting, landscaping, and even tiling, that many homeowners do on their own. It’s easier and can mean cutting down on the amount that was to be spent on labor a lot. As long as you’re reasonable with your ambitions and don’t take on too many commitments that you know you can’t handle, then it’s a good system.
- Key Tip: DIY work can be a great way to add personal touches to your home without additional cost.
Conclusion
Building a custom home is the dream of many homeowners, but they are always worried about the cost, especially when they are working with a limited budget. It is a misconception that owning a custom home will be very expensive. If you manage your budget well, choose less complicated designs, and practice in terms of materials and energy efficiency, you can build a beautiful home at a reasonable price and use it for many years. Don’t hesitate to engage professionals like Christopher Custom Homes to help you avoid or overcome some of the pitfalls.
FAQs About Building a Cost-Effective Custom Home
What is the most efficient type of house to build?
The type of home that is best to build is often a small rectangular shape with good insulation. Energy-conserving windows and doors, as well as efficient heating and cooling systems, are available to help reduce energy bills and create an environmentally friendly home.
How do I save money on a custom-built home?
To save money on a custom-built home, one should start early with overall planning and budgeting, prefer simple designs, use local products, and consider modular or prefab construction. Also, choosing energy-efficient technologies and doing minor work yourself will help save more money.
What is the most expensive part of building your own home?
The biggest part of the expense always goes into the framing and foundation, as it takes many materials and labor. In addition, in preparation for construction, costs such as land acquisition and preparation, as well as costs related to the installation of utilities, are additional expense factors influenced by the project site.
What is the most inexpensive style of home to build?
A ranch-style home is preferably the most economical type of home construction. It does not require much complex construction as it is a single story and hence will require less labor and minimum materials. The design here is likely to be rectangular or L-shaped, as these are easier and faster to build.
How do you build a super-efficient home?
If you want to build a super efficient home, focus on insulation, windows, heating, ventilation, and air conditioning systems. Another way in which sustainability can be achieved is the integration of solar panels, as well as the use of sustainable building materials.
How long does it take to build a custom home?
On average, building a custom home can take 9 to 18 months to build; however, this depends on various factors, such as the type of climate, the selection of materials, as well as the complexity of the construction plan. However, this preparation time can be reduced to some extent by using prefabricated homes.
Can I make changes during construction to save money?
Yes, it is more effective when major design and material decisions are made before the construction process begins. Changes in ideas often mean that projects will take longer to complete and cost more than expected. Always remember to talk to the builder about how changes will affect their finances.